

Best DAW for recording vocals
In my opinion, the best DAW (Digital Audio Workstation) for recording vocals is Ableton Live.
I’d also add that I think it’s an easy decision because nothing really comes close. If you want to know my reasoning then carry on reading and I’ll explain the things that make it the best DAW for recording vocals.
What do you want in a DAW for recording vocals?
You don’t want the software to get in the way of simply getting the vocal recorded. Whether it’s something that’s just come to you or you’ve rehearsed it, you just want to get it into the computer.
Ableton fits this expectation better than any other DAW I’ve experienced. Once you have a basic familiarity with the software you can quickly arm and record a track. With Ableton, you don’t even have to stop it from playing. You can do it on the fly.
Using a good DAW doesn’t guarantee a good vocal
The DAW is just one of the things you need right to get a good vocal sound, and getting a good vocal is the most important part of most songs.
1. Personally, I always use a pop shield. If you use one there’s no detriment to the sound but you may just avoid annoying pops ruining an otherwise good vocal take.

2. Get your space where you record vocals right. You don’t want background sounds and you don’t want reverb, reflections or your surroundings affecting the tone adversely. Like if there’s too much “boom” or bass emphasis. I found a great place to record my own vocals that I use all the time now.

3. Make sure you are using a good sound interface with a good microphone and headphones for recording vocals. The better the vocal recording in the first place, the less you’ll have to do later.

Can you automatically create an audio track and record?
Not quite but practice pressing “Control t” as this creates an audio track.
Next, click on the record icon for that track and it will turn red. The record button on my MIDI controller keyboard then starts a recording on that track. Anything from the microphone then gets recorded. It’s as simple as that. Don’t forget that you can use MIDI controllers to operate Ableton Lives functions.
You can then use specific “Play and Record” buttons. It’s easier than using the mouse for everything. If you need information about setting up MIDI Controllers read my guide.

The picture above shows the M-Audio Oxygen 8 v2. I use these stop, play and record buttons all the time. It makes the recording process a lot less like using a computer. The computer just sits in the background like the old tape machine used to.
Stretching the vocal
While there are plenty of things in the studio that can tune a vocal, there’s nothing I’ve found that’s as quick or easy as Ableton when it comes to stretching or shrinking audio.
It really does turn the audio track into a piece of elastic. You can quickly add warp markers, which act like drawing pins in the “elastic” so you can stretch or shrink between these markers, leaving what’s before unaffected.

In the picture above you can see an audio track that has had warp markers placed automatically. These generally do a good enough job but if they don’t, or if you want to try something more extreme, you can just move them around. this stretches and shrinks the audio like it is elastic.
You can quickly get vocals in time with the track. It’s so good I’ve actually recorded vocals without a guide-free form. Then lined them up to the track afterwards.
Gone are the days when you had to sing a vocal to the guide track so they synced up. I often have the guide track on my phone and just use its transport controls while Ableton records everything. I just go back through the track and use the bits I want.
Vocal comping
Ableton makes it easy to set up audio tracks on the fly, if you need to without stopping what’s playing.
You can arm a track to record without stopping what’s playing back. When I’m planning to record vocals, I set up 10 audio tracks and set up locators for parts of the song. I program keys on the computer to jump to these locators and keys to select between the 10 tracks. I can then use my MIDI controller keyboard (M-Audio Oxygen 8 v2) to switch between the tracks and locators.
This means I don’t miss any good vocal takes and going back through them makes it easier as they have some organisation about them as for song sections. I can then note which takes are good.
In Ableton, you can easily cut the audio with the “control e” command. You can then hold the control key while you move them around, creating copies of the bits you want on another track.

Now you can quickly get a vocal take from all the good bits. You can easily rearrange the vocals if you change your mind about how you want it.
Tip
Don’t delete any of your vocal takes. You never know when you want to use something you previously discarded.
Some off-the-cuff things can work incredibly well in the right context.
Using the session page and putting vocal phrases as clips means you can play a vocal and record it to the arrange page. You can come up with stuff you wouldn’t ordinarily have thought of and it’s great fun to come up with something original by accident.
You can even record your vocals as clips on the fly if that’s the way you want to work
This, for me, is the best thing about Ableton and why it’s the best DAW for recording vocals. It works however you want to without forcing you to do it in a way it wants.
There are so many ways to do things how you want to. You always come up with fresher more original and better performance when you’re happy with the technology you’re using.
Ableton Live effects
Ableton comes equipped with all the effects you need to mix your vocal once you have recorded it successfully.
The first thing you’ll do is compress it. Ableton Live has a compressor ideal for use on vocals, however, having the right plug-ins is only half the battle. You need to use them correctly.

Compression is one of the hardest effects to set correctly and one of the most difficult for the beginner to get to grips with. Firstly, check out my using effects beginners guide to get the basics and then have a look at my guide for using compressors on vocals for some extra information and tips.
Once you’ve mastered compression (probably the most important effect for vocals) you can move on the the more creative effects. Reverb is notoriously difficult to get right on vocals. You either can’t hear it or you swamp it. If you haven’t tried ducking reverb now is the time. It will make it a lot easier to get right.
You can use this effect with whatever type of reverb you like but used with convolution reverb is scintillation when you get it right.
Tip
Always keep a microphone connected to your sound card while you are doing ANYTHING in Ableton Live.
Then you’ll quickly be able to record a vocal. Get into the habit of leaving the microphone not only connected but set your sound card with the microphone input level so that you are ready to go. You can make this a habit as soon as you boot up Ableton.
Even if you’re not expecting or preparing to record anything. It’s amazing how many times a vocal phrase comes into my mind when I’m doing something else like programming a drum track or a synthesiser sound.
Chorus can sound really nice on vocals and can add that certain something that you can’t quite detect.
It’s all too easy to get wrong with something too swirly. However, I’ve found the perfect chorus plug-in for vocals so check out my guide. Also, have a look at my tips on using chorus on vocals to avoid common mistakes.
You’ll also need to EQ your vocal and Ableton has just the tools for this but again you need to do it correctly to sound “right” and again I’ve put together a vocal EQ guide to help.
Although Ableton Live has plenty of EQ options, if you find you need something better then have a read of my best EQ guide. You’ll find there is a plug-in that’s universally used by many for EQ-ing vocals and I promise you won’t be disappointed by it. It also has some excellent displays to help get you’re EQ right. It definitely helps to see as well as hear what you’re doing.
Other DAWs and stuff I’ve used
Just in case you think I’m trying to sell you Ableton because it’s the first thing I’ve used, I’ll tell you that I go back to the beginning of time when it comes to DAWs. In fact, I go back to before time started.
The first computer I used for music was a Sinclair ZX Spectrum. I used this with the XRI Micon MIDI interface and sequencer (back in 1984). Then a Yamaha CX5MII as a sound producer and sequencer.
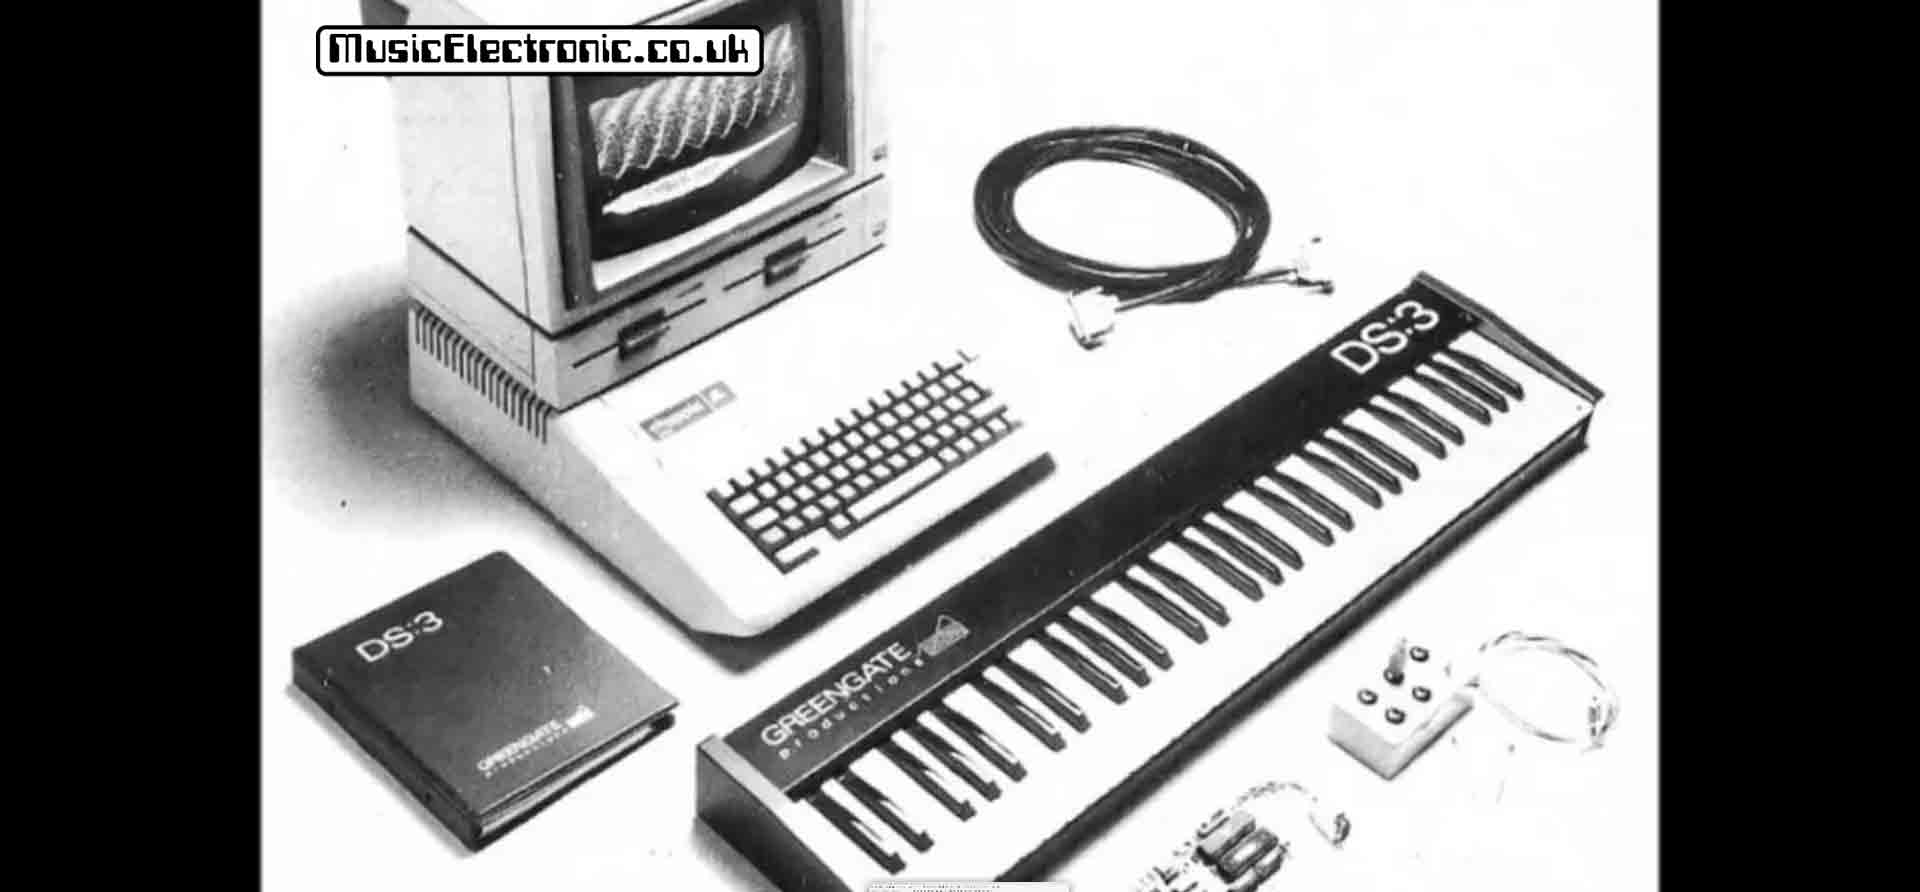
I then bought an Apple Iie, which together with the Greengate DS3 was one of the very first sound samplers. A kind of poor man’s Fairlight. (I say poor man’s, but I recall I paid around £2000 to get the system.)
Then the Atari ST ran Steinberg PRO24 (which became Cubase which then ran on the first PCs which started to add audio capabilities). Once I got a PC I used Hybrid Arts EZ track+ sequencer. Then Steinberg Cubase became my main sequencer for a few years.

Once I saw Ableton Live and tried it out I started to think that this was the way to go. This was about the time of Ableton 5, so I’m not claiming it was love a first sight but eventually, I knew I’d have to give up my beloved Cubase and migrate to this new DAW.
I’m definitely glad I did as since then Ableton have made their DAW even better. I also keep an eye on FL Studio, Pro Tools and Propellerheads Reason, as I’ve had to use them for other projects, but more than ever, I’m convinced that Ableton Live is not only the best DAW for recording vocals, but the best DAW full stop.
Other stuff that your DAW can’t sort for you
Don’t forget that apart from the DAW you need to make sure that you’re doing everything else possible to get a good vocal sound.
Firstly, you may need a pop filter. You also need to have a good space to record the vocals.
Once you have the vocals recorded you need them to sound the best they can and you will need to use effects. If you need help here you can learn with the beginners effects guide.
You will almost certainly need to use compression. You might also need to use headphones for recording vocals so check out my guide for some tips on what to use and some methods in which you can work without them.
The best DAW for recording vocals: Final thoughts
It is worth noting that a DAW makes recording and editing vocals takes, a million times easier than the old days of using magnetic tape.
Editing, cutting bits, copying and moving is easy with a DAW. Stretching audio to fit is easy with Ableton Live, but if you are already happy with a DAW, I’d seriously carry on using that. If you’re starting out I’d definitely go with Ableton Live and if you’re not happy or are struggling with recording and getting vocals right you should certainly take a look at Ableton Live.
Once you’ve got to grips with the basics, there are a few other techniques to get your vocals sounding even better.
One of these is parallel compression. This can give you the best of both worlds when it comes to compression and its pitfalls. You’ll also be surprised at how different types of compressors can make a vocal sound.
Once you get more experienced at using them you’ll probably do what I often do. That is to use two different types of compressors on a vocal. You use the strengths that each type has to your advantage.
Also, don’t miss out on convolution reverb. if you’ve not discovered this effect yet. Ableton Live has a very good implementation of it for you to get to grips with.
Remember a DAW can’t perform miracles. You need to get the basics right as well. Recording vocals in the wrong environment with a poor-quality sound interface won’t help.