

Matching EQ (FabFilter Pro Q-3 and Ableton Live)
Some people seem to think that if you match the EQ of your finished track to that of a commercial finished track, your track, will somehow become like the professionally mastered track. Unfortunately, matching EQ is only one of the things you need to get right.
All it will do is attempt to EQ your tracks to have a similar spread of frequencies to the track you’re sampling.
These are two totally different things and you need to get that straight away. Otherwise, you’ll just be disappointed.
Another thing to realise is you should really try to use a track that is similar to yours. By that I mean it has similar elements. For instance, it would be a complete waste of time if you used a power rock track to match the EQ to your acapella track.
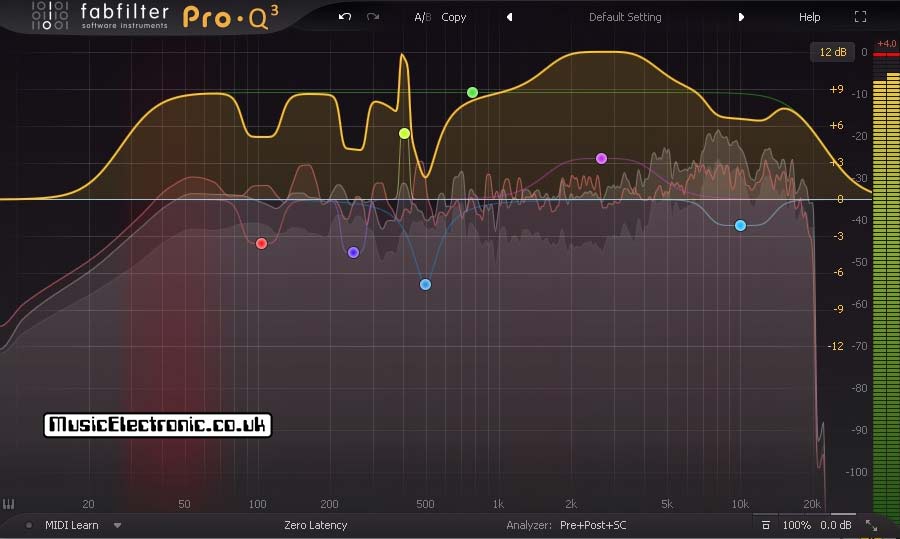
You need to have realistic expectations
If you are trying to get a particular sound you’d be better analysing how that is achieved by using your ears.
For instance, I’ve just heard a track on the radio. Janet Jackson – What have you done for me lately? It comes from that period of the eighties when it was fashionable to have a huge drum sound. In this track, it’s achieved by not having too many other sounds to compete with. If you listen to the track from another room (a good idea to check mixes anyway) or listen to it with the volume turned down.
You’ll basically just hear the drums and the voice. This is interspersed with the melody which doesn’t compete with either the vocal or drums frequency-wise. If you have a large drum sound and start to mix lots of other sounds into the track, you diminish the effect of the huge drums by detracting from what the ear is listening to.
It’s all about perception. black never looks any blacker than when it’s against white. White never looks any whiter than when it contrasts with black. Similarly, a sound sounds louder when it has silence in the background. Introducing too many other elements detracts from the drums.
This is the sort of thing you should probably be paying attention to rather than thinking matching the EQ of a track will make your track sound similar.
What it is good for
What it is good for though is to make sure you’re not getting your tracks unbalanced in the frequency department.
Things like getting a track too bass-heavy or bass-light are easy to do with anything other than very good monitoring. Unfortunately, not many of us have studio quality monitoring so matching a frequency response can certainly help. Don’t just rely on it alone though use those ears that you have to make a decision.
If you can’t afford expensive monitors don’t ignore headphones. There are some quite decent ones around these days and the old advice of not to mix on headphones isn’t as apt as it used to be. It’s certainly better to mix on decent headphones if your monitors aren’t that good.
How do you do EQ matching?
So now that you realise that EQ matching won’t solve all your EQ and mastering problems and your expectations are more realistic how do we actually set up this effect?
I’m going to do this with the Fabfilter Pro Q3 as this is already one of the best EQs around. I’ve already covered the Fabfilter Pro Q3 and how good it is here so have a read if you’re in any doubt.
As it’s my main EQ not only can I do EQ matching with it but you can also give it a tweak afterwards to see if you can make things sound better.
Instructions on how to do it
In my opinion, the manual isn’t great in explaining how to do this. It doesn’t make clear how to set up which is the track you want to alter and which you are using to source. Also, it doesn’t really show you you to route the sidechain, although this does vary depending on your DAW.
I’m going to do this in Ableton Live but you should get the idea of what I’m doing so you can do it in another DAW. Basically, you put the EQ plug-in on your track, the one you want EQing and you feed the sample track, the one you want to sound like, into the side chain.
Step by step
1. Firstly, I’m just starting with a new project and using 2 audio tracks. To make it more obvious what I’m doing, I’m naming the tracks “Sample track” and “My track”. Then put the track you want the EQ to match on “Sample track” and the track you want EQing (your track) on “My track”.

2. Next put the Fabfilter Pro-Q3 onto “My track”

3. Next you need to send the audio from the “Sample track”. To do this look down towards the bottom of the “Sample track” column. You’ll see “Audio To” and under this heading is a box. By default it’s set to “Master”, so click on it and select “My track” from the pull-down menu.
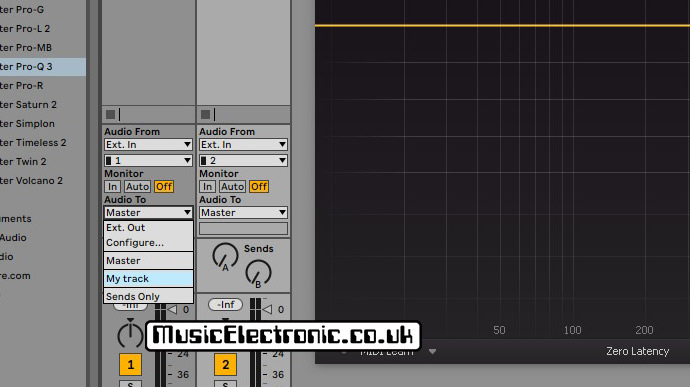
4. Then under where it now says “My Track” there is another box so click on that and select “Stereo Side-Chain FabFilter Pro-Q3”. You now won’t hear this track as it’s been routed to track 2.

5. Next on the FabFilter Pro-Q3 plug-in, on the left of where it says “Analyzer” is a “Pre+Post” button. Click this button and you’ll see a panel open up.

6. Next click on the “EQ Match” button.
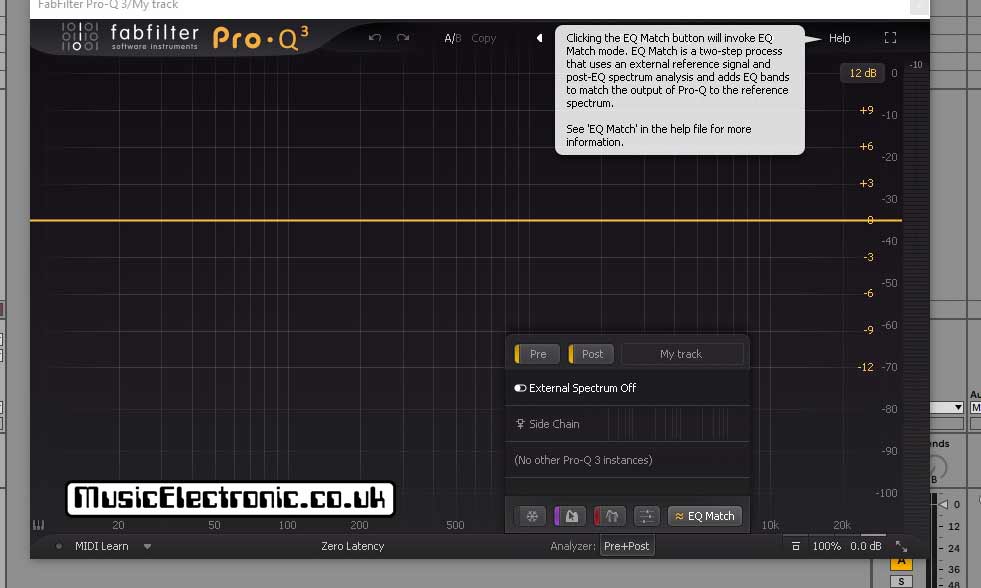
7. Then click on the middle “(Reference)” button
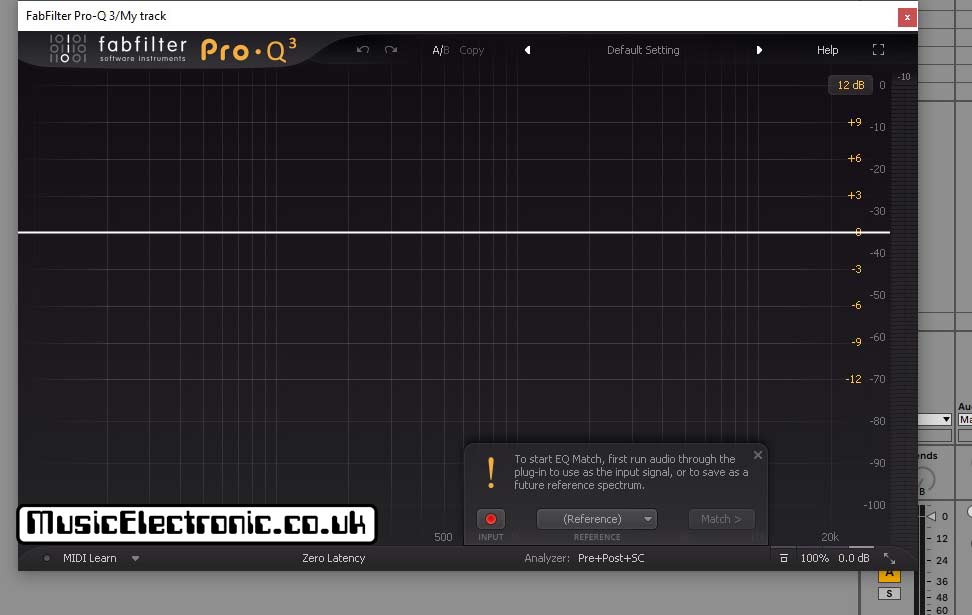
8. Select “External Side Chain”.

9. Next click to play your track. You’ll see audio waves appear and you’ll notice a prominent white line that is moving around.
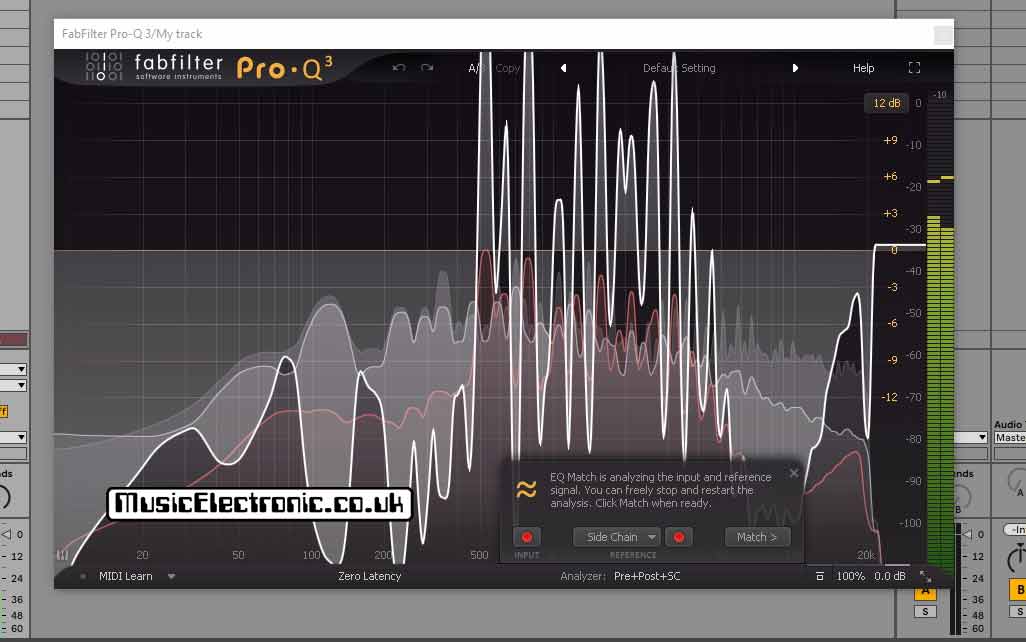
10. After a while the white line won’t change much and the match button will turn white indicating that it can be selected. This usually takes around 30 seconds and the analyser listens to the tracks and works to match the EQ. You can leave it to play the whole track but after a while, the line won’t be changing much.

11. On the screen, you’ll see a number of EQ bands have been created to try to match the EQ.
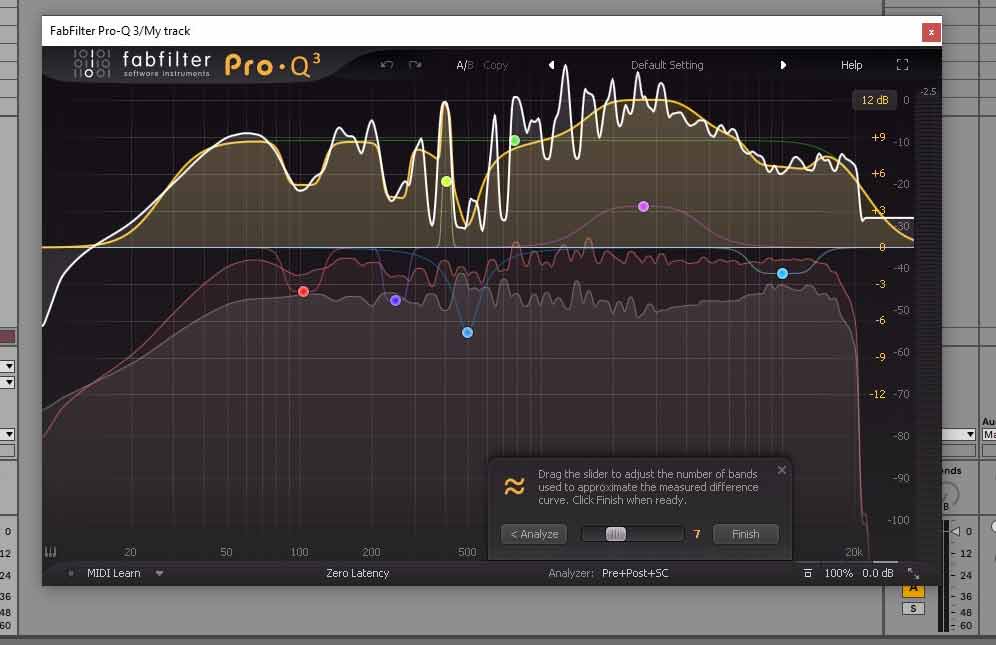
12. You can move the slider to increase or decrease the number of bands. The more bands the more detailed the curve will be.

13. I Generally leave it at the default, which in this case is 7. Click “Finish”.
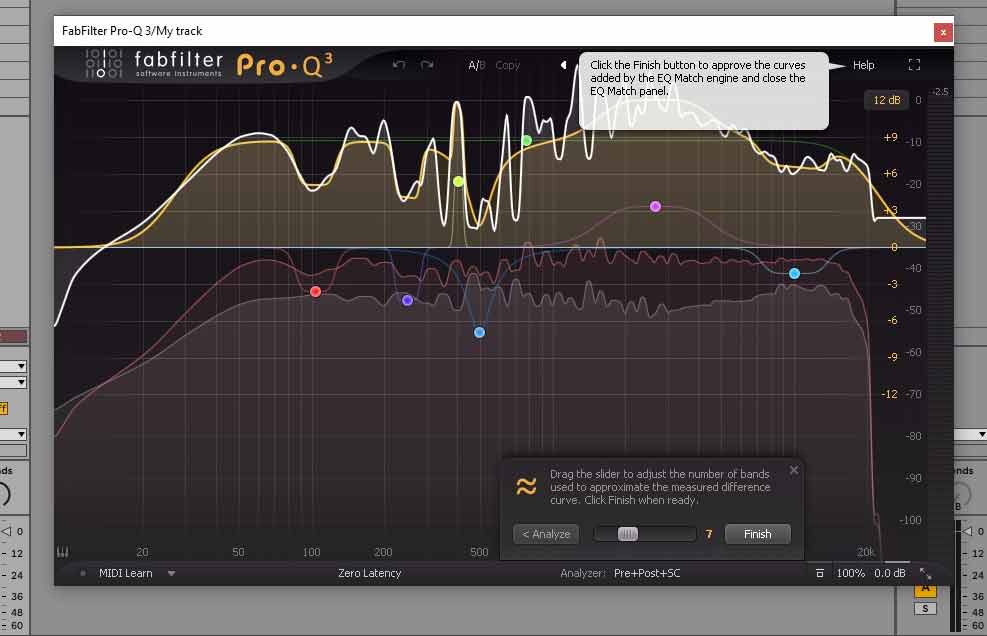
14. You’ll see the final EQ curve.

15. Now if you play, your track, it will have the EQ curve to match it to the sample track.

Final thoughts on matching EQ
You can also use the FabFilter Pro Q-3 for EQ matching for individual sounds.
If you’ve previously recorded vocals and you want to try to get the EQ the same you can just as easily feed it with a single track to analyse instead of a complete mix. It’s easier to manually EQ a track manually than a whole mix, but if there’s a tool available to do it, why make it hard for yourself? We can all do with saving a little time and this is a way you can do it.
Finally, if you do use EQ matching on a whole mix try to lower your expectations as to what it’s able to achieve and give it a try. Also check out my guide to using EQ when you’re mixing for more information.